What is the objective of a particular fighting style? Many would give the somewhat flippant answer that the objective is to win a fight. While this answer has a core of truth to it, it is also an answer which is lazy and ill conceived. A Mongolian wrestler, an Olympic fencer and a boxer will all consider themselves martial artists, they will all be fighting to win, and they will all have completely different objectives.
Many fighting styles have techniques and principles in common, but what defines one particular style from another is which techniques they emphasise. This emphasis is determined by the objectives of the people using it, which in turn is often determined by the context they are fighting in.
A couple of years ago, I was going down various rabbit holes on the internet looking into a Fairbairn Sykes dagger when I came across a copy of Captain Fairbairn’s book ‘Get Tough’. This small but excellent book describes a fighting style (Defendu) drawn from different eastern styles, honed on the waterfronts of Shanghai in the 1930s and and then taught to British commandos in the Second World War.
It is a minimalist style, stripped down to its essential elements and designed to be taught to large groups of people to get the most results with the minimum of training time. The commonality between armizare and defendu are that they are both close range fighting styles characterised by an excessively brutal finish. Both authors explicitly state that this is what their objectives are.
In the introduction to his book, Fairbairn writes ‘you cannot afford the luxury of squeamishness. Either you kill or capture, or you will be captured or killed. We’ve got to be tough to win, and we’ve got to be ruthless – tougher and more ruthless than our enemies. … once closed with your enemy, give every ounce of effort you can muster, and victory will be yours.’
In a similar vein, Fiore writes in his introduction that his students should be ‘fighting for your life with every deception and falsehood and cruelty that can be done. … aim to hurt them in the most painful and most dangerous areas. In the eyes, in the nose, in the soft part under the chin, and in the flanks.’
It is interesting to compare these two style which have absolutely no cultural commonality at all, but share identical objectives. It is not surprising that the two styles share so much common ground in the techniques that they teach, given that their objectives are identical. Here are ten examples of commonality between the two.
Fiore’s 1st scholar of grappling compared to Fairbairn’s escape from a bearhug.Fiore’s 8th scholar of grappling compared to Fairbairn’s hip throw.Fiore’s 10th scholar of grappling compared to Fairbairn’s knee. Fairbairn includes groin attacks as frequently as possible.Fiore’s 11th scholar of grappling compared to Fairbairn’s escape from a bearhug.Fiore’s counter to the 7th scholar of the 1st master of dagger compares to Fairbairn’s back break.Fiore’s 2nd scholar of the 3rd master of dagger compares to Fairbairn’s escape from a strangle hold.Fiore’s 5th scholar of the 3rd master of dagger compared to Fairbairn’s handcuff hold. Fiore calls this the lower bind and uses it in multiple contexts throughout his book.Fiore’s 5th master of dagger compared to Fairbairn’s escape from a stranglehold.Fiore’s 1st scholar of the 9th master of dagger compared to Fairbairn’s disarm from the front. The mechanics of disarms remain the same regardless of the weapon. Fiore’s 5th scholar of the sword in one hand compared to Fairbairn’s disarm from behind. Fiore calls this the middle bind, and uses it frequently.
One of the advantages of living where I do is that we have lots of banana trees growing here. Banana trees make excellent cutting targets. They are heavy and wet and dense, but also slightly spongy. They are about as close as you can get to getting a body without actually using a body. They have a fairly short life span and need to be cut out and trimmed. That gives us a good opportunity to practice cutting.
In this video, I am taking a look at the penetrating power of a spear. Spears not only have an advantage over most weapons in terms of reach, but also mass. This one weighs just under two kilos as compared to my longsword which weighs 1.4 kg.
Stepping off the line comes up quite a lot throughout armizare. There are plenty of examples throughout the book. If you go hunting, it comes up again and again and again.
When you’re stepping offline, the typical pattern is to step offline, make a beat and then step through with a counterstrike. But one of the questions that comes up every now and then is, is which way do you step. Do you step left or right when stepping off the line? The answer that you give has quite different ramifications.
Whether you step to the inside or outside, neither is wrong exactly, but they have very different tactical attributes. It makes an interesting concept to play around with and explore what difference it makes.
Just because something is in one chapter of Fior di Battaglia doesn’t mean that is has no relevance in all the others. Pommel strikes are fun close range attacks that share a lot of common ground with dagger strikes. Do you ever get to use these in your sparring?
Here’s a selection of bits of wood that I like to use as weapons. I have my old bokken, what I am using as wasters these days, a short staff and a rondel dagger. We will have a quick look at each of them in succession.
This is my bokken. I started off with a piece of wood, which is an inch by two inches and then I cut the curve into it. I trimmed a long shallow v out of the middle and trimmed triangles off each end and then set to it with a heavy rasp and a file and ultimately sand paper, leaving the handle with an inch by an inch and a half cross section. I have been through a few of these. This one is made from Australian red gum. It’s a heavy, solid timber. I’ve abused this bokken fairly substantially over the years, and it’s held up really nicely.
I used to own one which was made out of Japanese Oak and broke it within a fortnight. I was pretty disappointed with that given how much I had heard about the quality of the wood. But this one has held up quite well. Its very solid and reliable.
I also used to own a bokken I made out of yellow box. It was not so well shaped, and I eventually cut it up for firewood, but the yellow box was an excellent material for making training weapons. I tried to test it to destruction one day, but outside of a few savage nicks, it came out unharmed.
This is what I am using for wasters these days. I used to put cross guards on them, which do make them handle better, but I kept on breaking them. So now, I just use a single piece of wood, which is just based off the idea of a bokken. Again, it is an inch by an inch and a half. That rectangular cross section gives you a sense of edge alignment far better than a round piece of wood. I carve a simple pommel on the end and shape the handle a little to feel where the handle stops and the blade begins. For the blade I just smooth the corners off. They are simple and light. If you want to play around with the balance, you can start with a heavier piece of wood, make the tip a lot thinner, and leave more weight in the handle. This becomes more important if you are making a heavier waster. If they are only fairly light, it is not such an issue.
This is made from a piece of decking plank which I cut down. It costs around two dollars for each waster, plus the time I spend shaping it. Although technically a hardwood, these are fairly light, and I treat them as disposable. I don’t care if they get broken. That’s basically what they’re designed to do. I used to have a couple of nice ones made out of some heavy hardwood, but they kept breaking. So now I don’t bother putting that much effort into them. I just use a simple stick like this, and that’s good enough to do the job.
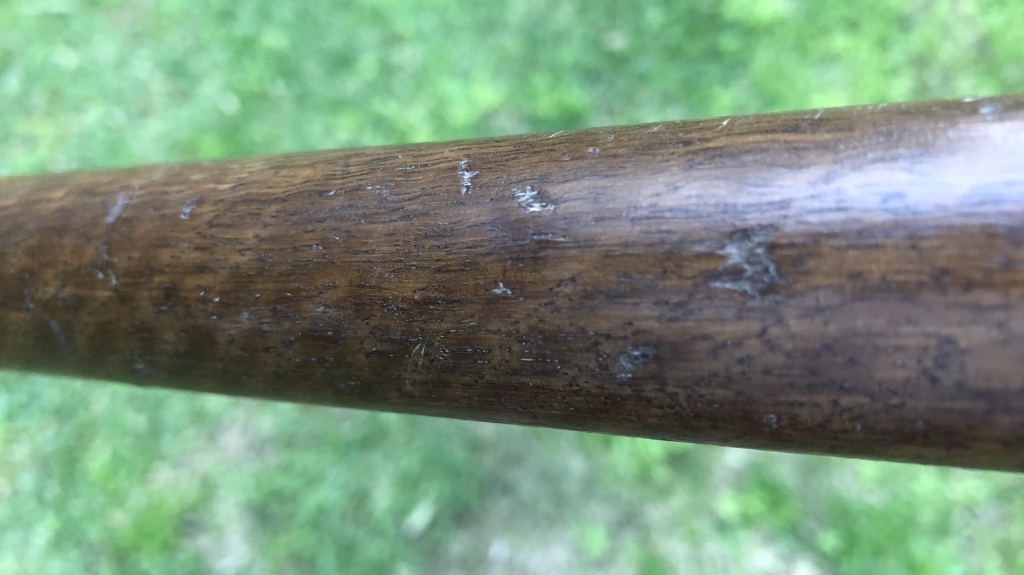
Next is one of my favourite weapons and its about a simple as they can get. It’s just 120 cm of hickory with a diameter of 32 mm. Because of the density of the wood, it is surprisingly heavy and weighs around 1400 g. This started life as a shovel handle, which I bought at the hardware shop somewhere in the mid nineties and trimmed down to shape. Again, I just used very simple tools – a rasp, a file, and some sandpaper. This staff is damn near indestructible. I’ve had it for 25 years, done some seriously abusive things with it, and the most damage its ever picked up is just a few small dings. The kids have taken this and put it through all its paces, but it stands up to anything.
I was practicing spinning this one day when I accidentally clipped my elbow with it. The pain was so much that I couldn’t speak or move. At first I thought I had shattered the joint, and it was four days before I got full mobility back. Hickory is an excellent wood to use. Tight grained, dense, heavy and strong, although harder to get hold of now than it used to be.
Rondel daggers are dead simple to make. This is literally a piece of firewood that I dug off the scrap heap. Again, it is very roughly shaped with a handle carved into it. This one has a bit of a crack in the wood, although that is not as exciting as it looks. It’s more discoloration than anything else.
You want to keep a nice square point on the dagger especially because obviously the only thing you can do with these is stab someone and they’ve got absolutely zero flex in them. So you want to leave a nice square point so that you can do the least amount of damage to your friend as possible.
So that’s a quick run over some wooden training weapons. They’re really good. I like them. The advantage of using these sorts of things is that they are cheap, effective, and historically accurate. If you spend a bit of time on them, you can get them reasonably well balanced. They are excellent for practicing drill sets because they’re not sharp. You can go as fast and hard as you like with complete safety. Every now and then, give them a light sand and rub some oil or wax into them. I typically use olive oil.
You’re far more likely to hurt your training partner than anybody else, so be aware of that if you are using them for any kind of sparring or partner work. The real big thing about them in that context is stabbing someone with them because they have no flex, so tend to hurt if you are not careful.
However, they are really simple to make, they are cheap, and if they break or catch fire, it really doesn’t matter. For materials, I prefer a solid hardwood such as hickory or yellow box or a red box.
In this video, we look at using a curriculum and outline how you can develop a structured training program to help. If you want to learn about how the components of sparring fit together, and most importantly, what goes into building a successful training program, then this is the video for you.
In this video, we’ll be applying a simple generic defence and seeing how it applies to all weapon systems. To improve your defensive capabilities and apply this simple principle to whatever circumstances you’re in, you need to look at Fiore’s universal defence. In part one we took a look at one of the introductory components of the curriculum, which is footwork. Here, we build on that and look at how to develop a strong defensive capability, across any weapons system.
How is it that some people are able to move with grace and ease across the floor while others are always stumbling over themselves? Why is it that some people are always at exactly the right range while others are never in quite the right spot to deliver an effective technique. And how is it that some people are always exactly where they need to be while others are constantly struggling from position? It all comes down to footwork.
When I am teaching basic movements, what I like to do is really exaggerate those moves and make them in quite a large generic sort of form. Although you can see this to a certain extent in all weapon systems, this tends to show up more in dagger work than in anything else.
A common criticism to using this type of training is that it is not how you spar or that these are not effective techniques. This is true to a point, but it also completely misunderstands the purpose of what is happening. When practicing a large movement like this, what you are doing is learning the base move that the technique is built on.
One of my early instructors worked as a somewhat overly enthusiastic bouncer. It was interesting to watch him fight because he had a very plain, yet highly effective fighting style. He never did anything particularly fancy or elaborate, or even especially unexpected. It was largely just a fairly limited range of basic techniques. He had an unbreakable structure, which was one of the reasons why he was so good at what he did, and he would constantly make the point that all fighting is just the application of basic technique. As a consequence, we used to spend endless hours of constant repetition of basics. It didn’t make for a particularly exciting class, but it was fantastic grounding work and it paid off. His point that all fighting is the application of basic techniques is a valuable one and well worth paying attention to when training with these large basic moves.
A good analogy I like to think of is teaching kids how to write. Every five-year-old writes in much the same way. It is all large circles and straight lines. Those are the basic moves that every five-year-old learns. It does not matter what country they’re from or what language they’re writing in. If they are using Arabic script, it’s circles and straight lines, and they all do it the same. Nobody ever gives them a hard time, saying “You’ll never get your thesis written if you’re writing like that.” It’s just understood that that is the framework that everything else is built upon later on. That is how you should treat base moves. They are a framework upon which everything else is built. They are not the finished product in and of themselves.
Part of teaching these base movements is to use the techniques in their fullest range. They are big, massive movements. You are not ever going to use this kind of thing when you’re sparring, but you can always make them shorter. That is the advantage of training like this. If you are making large movements you understand all the drive and power and momentum that you can get into it. So that if while sparring, you find yourself somewhere unexpected, you can realign your movements to deliver as much power and drive as if you were winding it up as a large movement.
Although it is very easy to make movements smaller, it is very difficult to make them larger. If you are constantly training to strike with short techniques, it is much harder to develop a sense of strength and structure and power as opposed to when you are making an exaggerated basic form. Basic form provides a capacity for reflexive adaptation. When you start large, you can always adapt it to the situation that you find yourself in. So regardless of what level you are at, it is well-worth performing and practicing these base moves before you start making an actual application of the technique you are practicing.
Another advantage to practicing with these large base movements is that when you are working with a partner, it’s a good deal easier on your partner to act in a defensive capability against something which they can see coming a long way off. That gives your partner the time and opportunity to develop their own defence. Again, you can always make these faster as you both improve, but to start with large base moves, gives everyone an introductory warm up into the exercise or that section of their learning. By improving your partner’s defensive sparring, you are also improving your own attack capabilities as you try to get through them.
All sparring is an interpretation of a base move. One of the things which really draws me to Fiore’s work is that he applies a small number of concepts to a wide range of contexts. Throughout For di Battaglia, you constantly see repetitions of the same base move happening in different weapons systems and in different contexts. But he is still using just essentially the same basic technique reinterpreted in a slightly different manner to suit the new set of circumstances. When practicing a specific play, understand what base move that play is built from, and practice that basic move. Whether you are just learning it, or you’ve been doing for years, the constant improvement of these base movements by practicing them continually at the full range will give you a far greater capacity to adapt during sparring and provide much greater strength and structure behind what you’re doing.
You are practicing, not so much individual plays, but a series of basic movements. By doing so, you will learn the power and structure behind them as well as get a feel for how to lock your entire body behind a single move. It is very easy to make them shorter and still maintain that structure. It is extremely difficult to start small and make them larger. Practicing large basic movements will also assist your partner and that will improve everybody’s training. Sparring is simply an interpretation of your basic moves.
When you are training, you often spend a lot of time checking things such as your lines of attack, your cover, making sure you know where your weapon is at all times, and ensuring you move with appropriate distancing. These are all important things to be in control of, and certainly should not be underestimated. Underlying all of them, however, as a foundation to all your movements is understanding what your hips are doing. To a very large extent, you move and fight with your hips. Everything else is just delivering a message.
The best fighters always look completely relaxed. They seem to move much faster, and with much less effort than anyone else. They always seem to be right where they need to be, having used very little effort to get there. To a large extent, this is due to good clean hip movement. It reduces all extraneous movement, and provides clear direction and intent. This is what gives these people fast and powerful techniques.
Your hips control your core, and this in turn, determines where your bodies energy is moving. Every action needs to be driven by the hips first. It is this hip motion which provides power through the shoulders and arms to the weapon. Beginning a technique with your shoulders or arms disassociates your bodies actions from its core. The top and bottom halves of your body will be moving in different directions and in an uncoordinated manner. The end result is a weak and slow technique. In contrast, by using the hips to initiate the movement, the body structure is aligned. This gives speed, power, and intent to any technique.
When initiating movements with the hips, the arms stay fairly still relative to the body. They will obviously move enough to give shape to whatever technique is being delivered, but essentially, they are always in front of the body, and reasonably still. This reduces the amount of movement required, making everything that much faster. It also reduces physical stress on the shoulders and wrists, leaving you with better control and extra energy to expend elsewhere.
Driving techniques with the hips anchors the body to the ground. This anchoring provides a huge amount of force and power to drive your techniques home. Whether you are striking aside an incoming attack, or trying to break through a potentially weak defence, the extra power you gain from a well grounded structure is a huge advantage. Its gives you strength which you don’t normally have.
As with so many things in any martial art, these things are better felt than described. By way of demonstration, choose a posta and a technique. Delivering a thrust and lunge from Dente de Zenghiaro is one of many examples you might use. Throw a few techniques initiating them with the shoulders first, then try the same technique powered by the hips instead. You should be able to feel a qualitative difference between the two. Techniques driven by the hips first should feel faster, smoother and more powerful.
Your hips provide your core movement. Everything beyond that is an extension of your core. If you control your hips and use them to initiate your movements, all your techniques will be faster and stronger, and you will be more relaxed. Your arms will be allowed to remain reasonably still, adding speed to your techniques and locking them to your core. Your actions will be solidly grounded adding power and strength to everything that you do. Whenever you are practicing your drill sets, keep in mind to initiate your techniques with your hips. Carry this habit into your sparring. For very little extra effort, this will dramatically raise the standard of everything you do.
This master has tied a strong rope to the saddle of his horse and the other end is tied to the foot of his lance. First he strikes the player, and then he throws the bound lance over the left shoulder of his enemy, to be able to drag him from the horse.
Interpretation
This is a very interesting play which takes a degree of planning and coordination, although it is very simple in its concept. In contrast to the lessons of the first eight masters of horseback combat, this play is not concerned with how, or even if, you hit your opponent. It is something of a backup plan for if they are still mounted after your best effort.
Take about three metres of strong rope. If your rope is too short, the play will not work, but if it is too long, you will tangle yourself up. Tie one end firmly to the butt of your lance. Using a quick release knot, anchor the other end to your saddle. Exactly where you tie this is dependent on the saddle design. Directly behind you in the saddle centre, as the picture shows, is the safest and mechanically best place. Next best would be to attach it to the pommel, although if you do this, the rope will cut across you as the rope pulls taut.
After the contact of the initial tilt, if your opponent is still on their horse, then you use this play. Throw your lance, or its broken stump if that is all you have left, straight out to your side and fairly high up. There is very little time, and the sudden change from the driving forward momentum to a sideways toss is a little strange, but it does not need any power, or even much accuracy. As long as the line crosses your opponents chest or neck, momentum will take care of everything else.
As they charge through, the rope will wrap around your opponent. Although it is impossible to say exactly what the lance will catch on, it is an awkward shape, and will surely catch on something. With a sudden and violent reef on your saddle, the rope will pull tight behind you. This is why you want it tied to the back of the saddle. Your opponent will be pulled backwards as their horse gallops out from underneath them.
If you are jousting for sport, the play ends here. If you are fighting to the bitter end, then take advantage of your quick release knot. Untie the rope and let it fall to the ground before closing in on your opponent. You do not want to tangle your own horse.
I come from Posta di Vera Croce with this cover, passing off the line by stepping diagonally. And of this cover, you will see what I can do, for my scholars will show it. They will compliment my play with a fight to the bitter end. Their art will show without doubt.
Interpretation
The Sword in Armour Master uses Fiore’s common theme of stepping offline with a beat and entering narrow play. Passing offline while beating your opponents weapon is also shared by the following.
From Posta Vera Crose, slide your right foot offline to the left. Step through with your left foot and sweep the blade across the body. Keep your right hand low and your left hand high so as to cover your whole body and make the action a smooth roll over. The step will provide plenty of hip motion to give this power. Bring your right forearm back to your so as to chamber your own weapon for a strike. This will leave you safely on your opponents outside line ready for narrow play.
Here begins the plays of sword in two hands in narrow play in which it will be of all manner of covers, and strikes, and binds, and breaks, and grips, and sword disarms, and throws to the ground in different ways. And they will be the remedies and counters for every reason that you need for offence and defence.
We stand here crossed and from this crossing we will make all the plays which follow. We can do the same as each other. And all the plays will follow one another as I said before.
Explanation
As with the 1st and 2nd Masters of sword in two hands, the 3rd Master also is crossed in a state of equalibrium with the player. Crossed at the base of the swords, both combatants have a strong bind. Either can take the role of master as stated ‘we can do the same as each other.’ The roles are decided by who moves first.
It is noteworthy that where the masters of wide play crossed swords with their left foot forward, the master of narrow play leads with the right. This closes the distance between the masters dominanat hand and the opponent, altering the lines of attack. Combat now occurs at the range of grappling and dagger techniques.
Here begins the plays of sword in two hands in wide play. This master who is here crossing this player at the point of the sword says: “When I am crossed at the point of the sword, I immediately switch my sword to the other side and fiercely strike a downward cut to the head or arms. Also I can put a thrust in his face, as you see in the next picture.
Explanation
The 1st Master of Sword in Two Hands defends against an attack with Posta Frontale at such a distance that both swords are crossing at the tip of the blade, as shown in the picture. In this position, we can see the major defining characteristics of wide play.
As a fairly broad definition of wide play, although each combatant can grab the weapon or possibly arm of their opponent, they are unable to effectively deliver a strike without making a step.
To more tightly define what is happening here, both swords lack any real leverage in this crossing, making both the Master and the player weak in the bind. Also, due to the distance of the combatants and the angles of the blades, neither directly threaten each other with the point.
It is interesting to note that in all other manuscripts of Fior di Battaglia, both combatants in this play are Masters. The equality of their structures means that the play goes to whoever has the presence of mind to take advantage of the circumstances first.
As the Master, due to the lack of pressure in the bind, you are free to disengage, quickly lifting your sword over the tip of your opponents sword. This leaves an open line to the outside, along which you can strike down onto your opponents right forearm.
I play with the arms crossed to make those remedies that have come before. And if we were both armoured, I could not make a better cover. A stronger remedy than me does not bear a crown, for I can make plays to the right and left. Also I can cross both below and above.
Explanation
The 2nd Master of Dagger fights from Posta Tutta Posta di Ferro, Incrosada e Dopia. This is a posta which notes the value of armour and its inability to make long covers. The mechanics of crossing the arms means you simply cannot reach out very far, making for extremly close play with very small margins of error. It is the close proximity to a dagger point which leads to the advice of only doing this with proper protective equipment.
At first glance, it seems as though you are blocking the attack in the cross of your forearms, but there are a number of subtleties happening here. As the dagger approaches, you are actually attacking the players wrist with your forearm. You will need to extend your arms far enough to keep the dagger clear, but not so far as to weaken your own structure.
Drive your attack with the left hip, and initially lead with the thumbs up. Immediately on contact, roll your hands inward so that you strike the players wrist with the ulnar edge of your left forearm. This roll will serve to protect your own arm and increase the force of impact. Your attack will stop the dagger while simltaneously jarring and hurting the players arm.
This is easier to do if you can catch the incoming attack before it has built up too much momentum. Get in close to your opponent using your left foot to close the distance.
From this position, you can also perform all the plays of the 1st Master.
This bold man fled from me to a keep. I rode so hard I reached him at the keep, always riding at full speed. And with my sword I struck him under the armpit, which is a difficult place to protect with armour. Out of fear of his friends I want to turn back.
Interpretation
This play does not fit any pattern previously found in the book. Reasons for its inclusion are speculative.
The scholar in the picture does not either have a master, or fit into any context of the book. Following the pattern of the book, this should be the scholar of the master who appears in the picture above, with the lance tied to his saddle. This makes no sense though, in terms of play continuity. Outside of the fact that they are both on horseback, the two plays have no connection to each other.
The position of the horses is also quite strange. They are both rearing up and facing more or less in opposite directions. Given that the scholar has just ridden down his opponent at full gallop, it seems kind of odd that they would then find themselves at a complete stop facing each other.
While it is superficially easy to understand this play (stab your opponent where they have no protection), it raises a lot more questions than it answers. Three possible explanations are that it is an allegory, a memorial, or a sketch.
The allegory.
According to this idea, the play represents the principles of armizare. The player is ‘always riding at full speed’, strikes at a target ‘which is a difficult place to protect’, and then wants ‘to turn back.’ This can be seen to represent the need to break suddenly through your opponents defensive shield, make a critical hit, and then move back out of range under cover.
In the introduction, Fiore tells us that ‘few plays pass the third master in the art. And if they do more, it becomes dangerous,’ so the idea of a fast entry, a short engagement, and a quick withdrawal is not without its merits. The theory of the allegory starts to fall apart, however, because in the dagger section, Fiore also tells us to ‘always do these five things. Take the dagger, strike, break the arms, bind them, and put him on the ground.’ If this play truly represented the principles of armizare, the scholar would follow the strike by catching the players arm in a lock, flinging his sword aside, breaking the arm while throwing the player to the ground, and then riding over the top of him, before looking around to see if he has any back up.
The memorial.
This play could well recall an actual event known to both Fiore and his sponsor, the Marquis d’Este. The scholar might represent either of those characters personally, or a favourite of the Marquis. Given the effort Fiore goes to in the introduction to name his own scholars, highlight his personal prowess, and heap praise upon the Marquis, however, it seems inconsistent not to name the main character in a picture which celebrates their achievements.
The sketch.
To produce a book of such high quality illustrations as this requires a lot of practice. What started off as a drawing exercise may well have taken on a life of its own. The inclusion of the tower looks like something of an afterthought. He may have just enjoyed the picture, realised it was on the back of a near complete folio, and figured that since it was the end of the book, it was easier to leave it in than start the whole page again, so he wrote a few lines to justify its inclusion. It seems a little odd, but no more so than either of the other theories.
Also this Posta Coda Longa (Long Tail Guard) is good when one comes to meet him with his sword held on the left, as this enemy does. Know that this guard works against all blows from right and left, and against anyone who is either right or left handed. Here begin the plays of Posta Coda Longa that always beat aside in the way that is previously described in the first Posta Coda Longa.
Explanation
With your right arm held across your body, and your right shoulder turned slightly to the front, you are positioned here to beat any attack across to your right.
As you make the beat, be aware that if you perform this with the same diagonal cut you are used to making on foot, you are likely to strike your own horse in the head. To avoid this, your cut must first lift up and then beat across the top of the horse. It moves in more of an arc than a straight line.
Not surprisingly, the scholars of the 8th master are not new techniques exactly, but previously described plays in the context of mounted combat.
There are several different examples both on foot and horseback of posta coda longa being used throughout Fior di Battaglia. You will see it in
We are three masters in guards with our spears, and they are based on those of the sword. And I am the first in Tutta Porta di Ferro (Full Iron Gate). I am placed to quickly beat the spear of the player, that is, I pass with the right foot and traverse off the line and in doing so, his spear will be beaten to the left. If I pass and beat in a single step, I will wound. This is something I cannot fail to do.
Explanation
Holding the spear vertically with the point up, the First Master waits in Posta Tutta Porta di Ferro to sweep and counter any incoming attack. The length of the spear means the sweep will cover the entire body in a single move, something like a sliding door, and can then smoothly rotate into a counter thrust, either high or low depending on circumstances.
Alternatively, the master can rotate the spear into Posta Vera Crose and make a relatively close range attack with a butt strike.
These are the plays where the guards are tested. Each guard can do them, and thinks it has the right. Whoever can beat the pollaxe of the player to the ground, as shown in these plays that I do, will do all of them if the counter does not give him trouble.
Explanation
Although the Getty MS shows the combatant on the left as a scholar, the Florius clearly shows them as a Master. Furthermore, all the pollaxe plays flow on from this one. This is functionally a master play despite the lack of a crown.
This can be done from any of the posta. Step off the line with your front foot, and then cut with the pollaxe through your opponents attack while stepping through with the back foot. This will beat the opposing weapon to the side. Use the considerable momentum generated by the pollaxes head to drive your opponents pollaxe to the ground.
Breaking the thrust like this will gain you the initiative, allowing you to continue in the following plays.
I am the first scholar of the master who is before me. I do this thrust because of its cover. Also the Posta di Vera Croce and Posta di Croce Bastardo can do this thrust. I say that immediately the player delivers a thrust to the master or scholar that was in one of these guards, then the master or scholar should keep their body low and pass off the line, crossing their opponents sword and keeping the point directed at the face or chest, and the sword low as shown here.
Interpretation
The first scholar exchanges the thrust and immediately enters into narrow play. This is a natural consequence of following the cover of the Master of Sword in armour.
From either Posta Vera Crose or Posta di Crose Bastardo, step the front foot offline. If you move it to the right, you will dominate the centreline. If you slide to the left, you will change the angle of attack. Sweep your sword across your body from left to right, redirecting your opponents attack to the side. You do not need to move it very far. As soon as it clears your right arm, you are safe.
Step through with your left foot. Because both you and your opponent are using a half sword grip, you need to fight from the narrow play. When your left foot lands, the point of your sword should be nearly touching your opponent without needing to extend your arms at all.
Lock your right forearm onto your hip. Use your left hand to direc the point to a gap in your opponents armour. Push forward with your right hip, driving the point in.
You will also see the exchange of thrusts in the following plays.
From the crossing which is done by my master with the right foot forward, I complete the first play. That is, that I pass with the left foot and put my left hand over my right arm and grab and hold his sword between his hands, in the middle of the hilt. And with cuts and thrusts I can hurt him. And this grip can be done with the sword in one or two hands. The crossing can be done above or below the hands to make such a grip.
Explanation
As the 3rd Master, both combatants had their swords crossed in the middle with the right foot forward.
Ensure that the crossing has given you a space to move into by keeping the pressure on the bind. Step through with your left foot directly down the centerline. Simultaneously advance your left hand in a straight line from your own sword, over your right arm to between your opponents hands.
You can grab their sword with your thumb down, as drawn. Alternatively, you can have your thumb up and grab from underneath. Both will work. Thumb down will provide better torque to twist the blade offline.
Pull your left elbow back to lock into your hip and twist or push your forearm to the outside. The details of what to do here is determined by the grip you have taken. Regardless, the objective is to disable the weapon and move it to the side. You will not have the leverage to strip it from your opponents hand, but you will put it out of action long enough to give you at least one good strike.
Clear your own sword by pulling it in a straight line down and to the right. Pivot on your left foot if needed to give yourself the appropriate angle and distance. A range of targets will present themselves for you to strike at.